Make Your Own Dubai Chocolate
Create this viral sensation in your own kitchen
Homemade Dubai Chocolate Recipe
My Take on Making Dubai Chocolate at Home
When I first came across Dubai Chocolate, I was instantly hooked, partly because of the pistachio (which I've always loved), but also because it felt like something luxurious and exotic, yet surprisingly familiar.
Trying to recreate it at home wasn't perfect at first, I didn't have all the right ingredients, and some early batches were a bit too soft or not quite balanced. But each time, I learned something new: the crunch matters, the tahini has to be subtle, and quality pistachio paste makes all the difference.
That's why I've worked to create a version that's not only delicious, but practical. It's indulgent, yes, but not impossible. You don't need fancy equipment or specialist skills. Just a few good ingredients, a little patience, and hopefully the joy of making something you're proud to share.
So if you're trying this at home, I hope my recipe saves you a few mistakes and gives you something you genuinely enjoy. And if you make it your own, even better. I'd love to hear how it turns out.
Ingredients
- 3.5 oz 100g Kataifi pastry, chopped and separated
- 1.8 oz 50g Unsalted butter
- 6.3 oz 180g Pistachio paste
- 0.7 oz 20g Tahini paste
- Fat pinch of sea salt
- 0.7 oz 20g White chocolate (for decorative drizzle)
- Gel or oil-based food colouring (optional)
- 0.5 tsp 2.5ml Coconut oil
- 7 oz 200g Dark or milk chocolate (for the outer shell)

Instructions
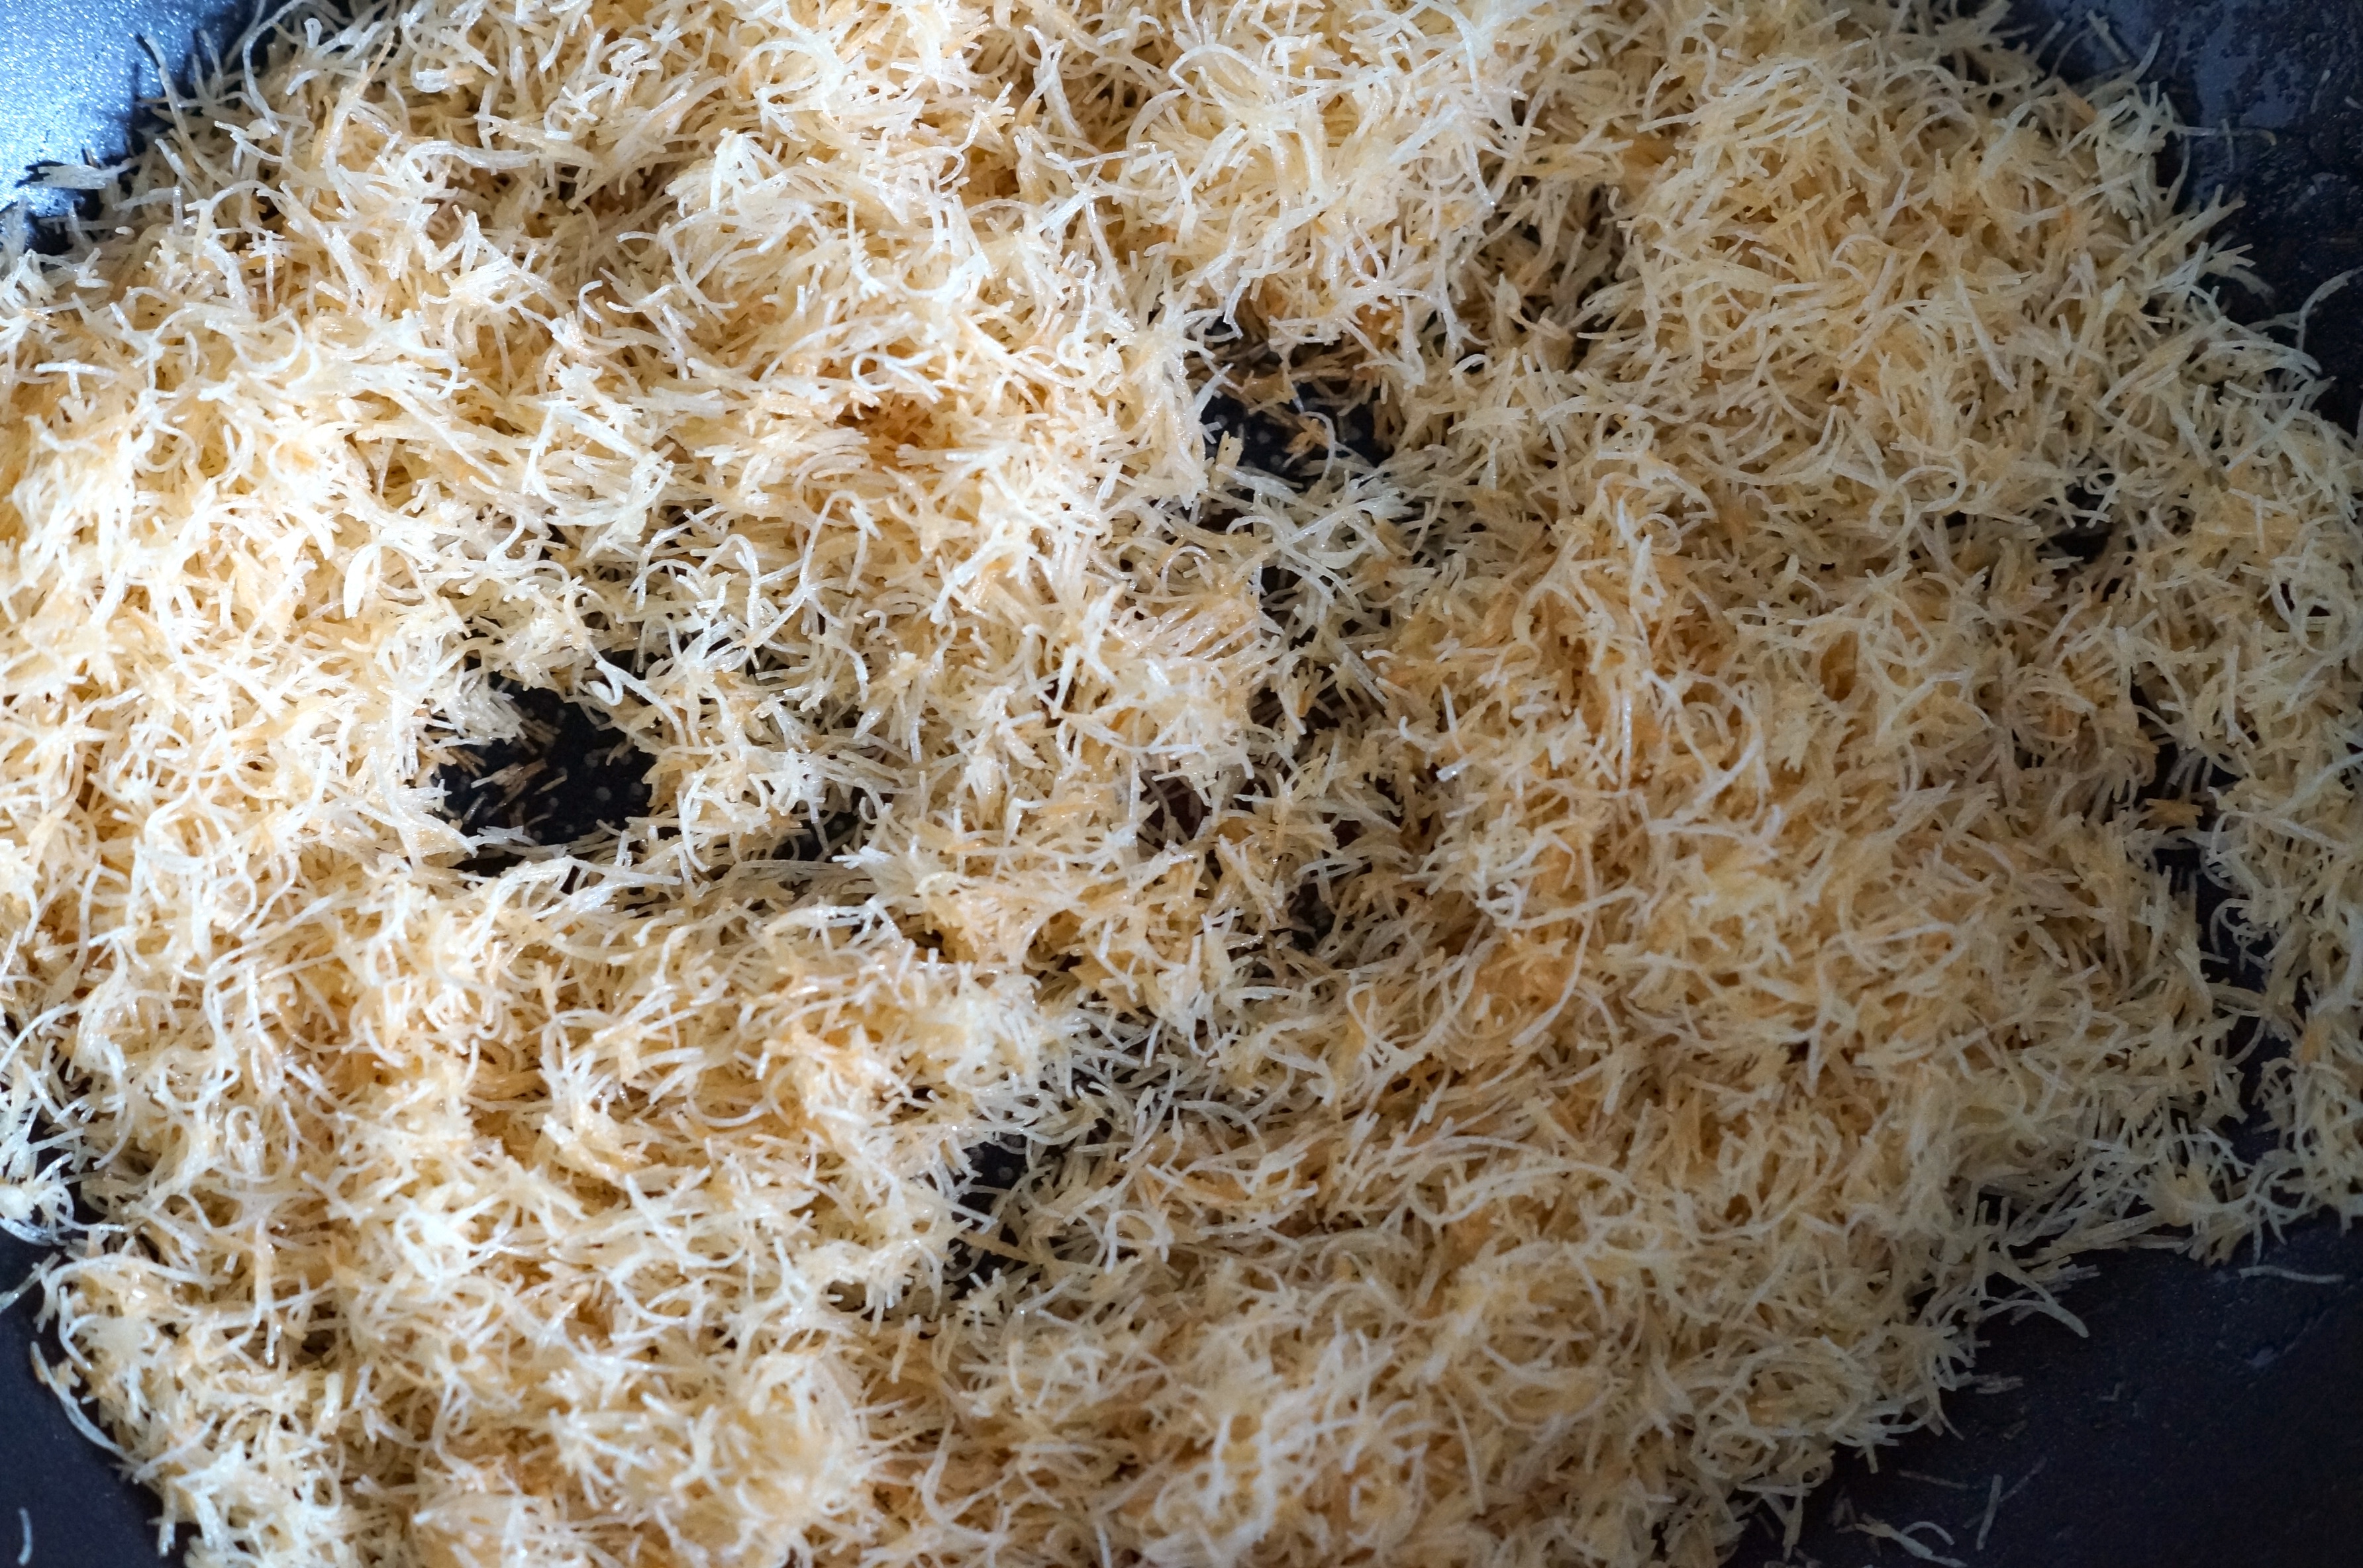
Step 1: Toast the Kataifi Pastry
In a large frying pan with high sides, melt 50g of butter over medium heat. Add 100g of kataifi pastry, breaking it up with your hands as you go. Toast the pastry for about 10 minutes, stirring regularly, until it turns evenly golden and crispy.
Alternative method:
If you'd rather not use the stovetop, you can also toast the kataifi in the oven. Preheat to 180°C (fan 160°C). Toss the broken kataifi with the melted butter and spread it evenly on a baking tray. Bake for 10–12 minutes, stirring halfway through, until golden and crisp.
Both methods work; it really comes down to your kitchen setup and preference.
This step is crucial; it creates the signature crunch that makes Dubai chocolate so satisfying. I personally prefer pan-toasting, as it gives a bit more control over the colour and texture, but feel free to experiment.
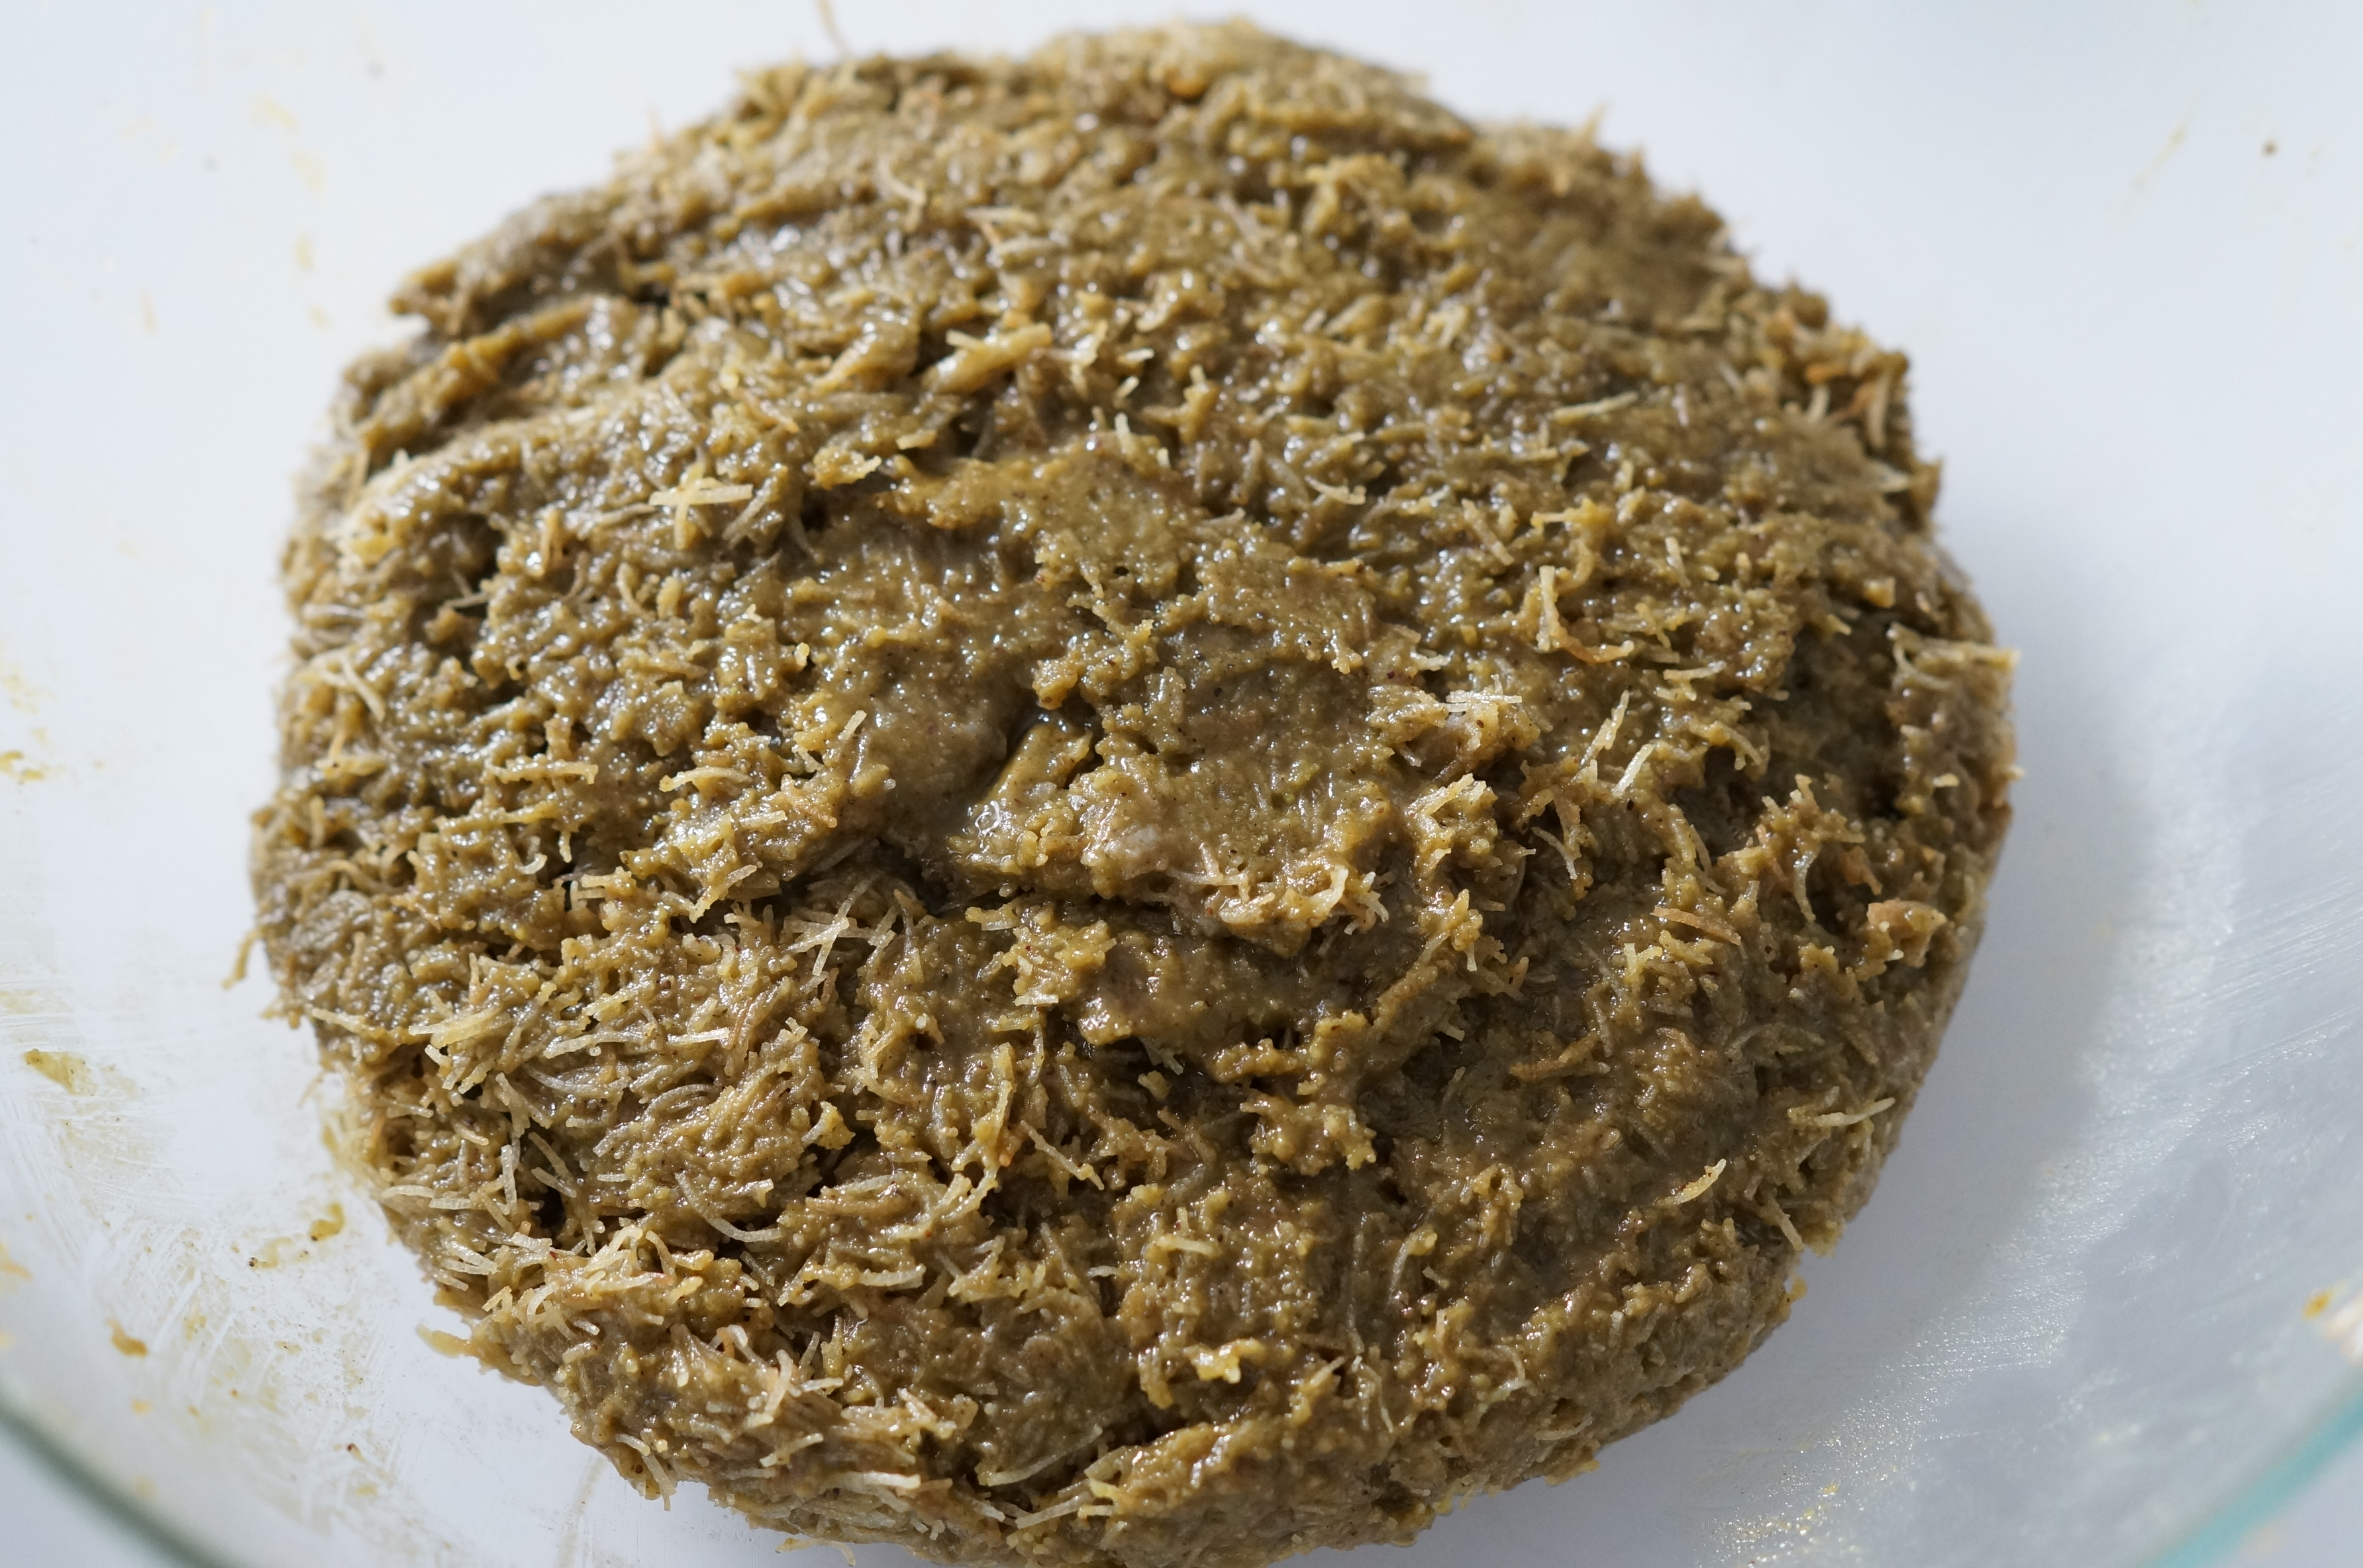
Step 2: Prepare the Pistachio Paste and Combine with Kataifi
In a large mixing bowl, combine the pistachio paste, tahini, and a generous pinch of sea salt. Mix well until smooth and fully blended.
Take a moment to taste the mixture at this stage; pistachio pastes can vary quite a bit depending on the brand. Some may be nuttier or slightly bitter, others more mellow.
If you prefer a sweeter flavour, this is the perfect time to stir in a small spoon of honey. Alternatively, you can try different pistachio pastes over time to find the one that matches your personal taste best; it makes all the difference in the final chocolate.
Once you're happy with the base, fold in the toasted kataifi until the mixture is fully combined and evenly coated. You should end up with a rich, slightly sticky filling, studded with crunchy strands of pastry, ready to be layered into your chocolate mould.
Step 3: Create the Chocolate Design
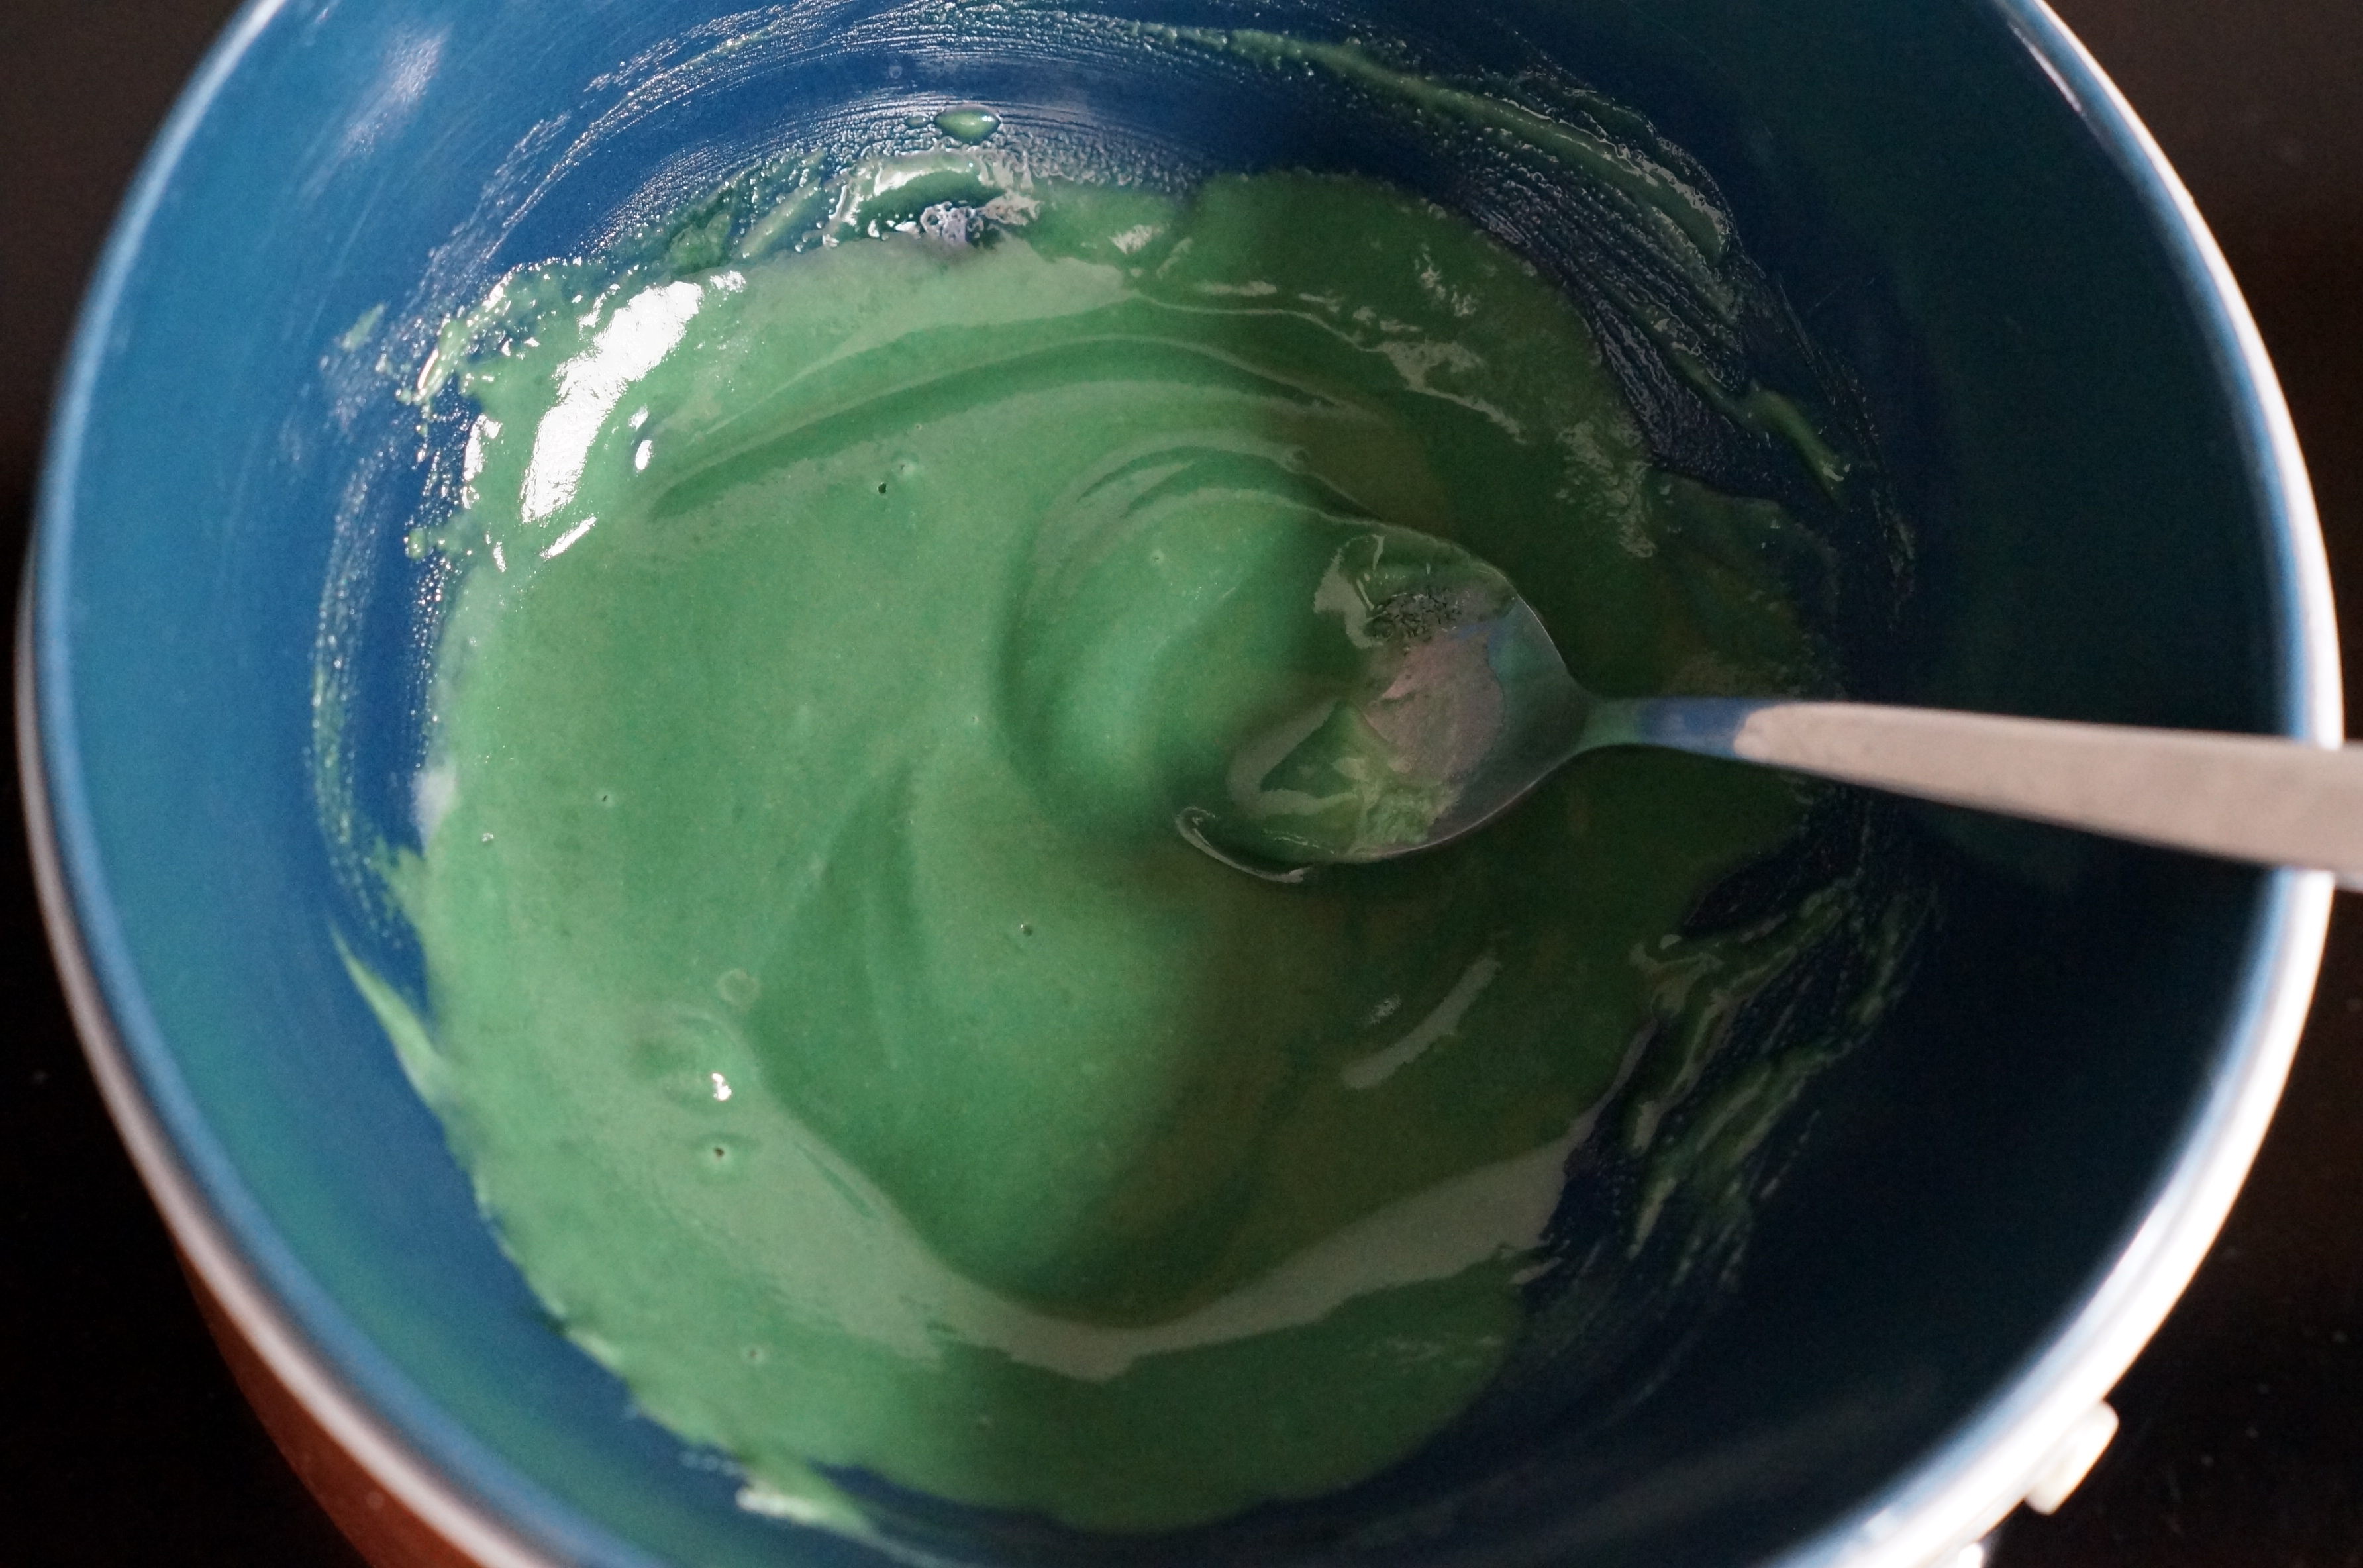
To make the decorative layer, melt the white chocolate using a bain-marie: place a heatproof bowl over a pan of gently simmering water (make sure the bowl doesn't touch the water) and stir until the chocolate is fully melted. Keep the heat low to avoid burning.
Once melted, add your food colouring, for example, a drop or two of green, and mix until evenly tinted.
With your mould ready on a tray, flick or drizzle the coloured chocolate across the base of the mould. Don't worry about being too precise; the messier splashes often look even better than carefully placed lines.
Once you're happy with the design, place the mould in the fridge for a few minutes to let the decoration set and stick to the mould before layering in the rest of the chocolate.

Step 4: Prepare the Chocolate Shell
Melt your dark or milk chocolate using a bain-marie again (a heatproof bowl over gently simmering water), stirring until smooth and fully melted. Keep the heat low and steady; patience pays off here.
For a glossier finish, stir in the remaining coconut oil once the chocolate has melted. This small addition helps the chocolate set with a nice shine and makes it easier to work with in the mould.
Now, here's an important tip: let the melted chocolate cool slightly before pouring. If it's too hot, it can melt or smudge the decorative layer you added earlier.
To avoid disturbing your coloured base:
Tip: Gently spoon a thin layer of chocolate into the mould, starting in the centre. Don't swirl or tilt the mould just yet; simply let the chocolate settle naturally. Allow it to rest and begin to firm up a little before adding more. I made the mistake of pouring while the chocolate was still too warm, and it melted my decorative layer, so take your time here and let it cool just enough to keep the layers clean. Once your base layer has settled and partially set, you can build on it without disturbing your design.

Step 5: Assemble the Pistachio-Kataifi Filling and Chocolate Shell
Once the chocolate shell has been poured into the mould, place it in the fridge and allow it to set fully before adding the filling. This helps preserve your decorative design and ensures the shell stays clean and intact when you press in the pistachio layer.
When the shell is firm, spoon the pistachio-kataifi mixture into the mould. If the mixture is on the firmer side, press it in gently with the back of a spoon or your fingers, making sure it spreads evenly without cracking the shell. If it's softer and more gooey, it will naturally spread; just make sure it's level.
Tip: Try to leave a small border of empty space around the edge of the mould. This gives your final chocolate layer room to flow down the sides and properly seal the bar, locking everything in.

Step 6: Seal the Chocolate Bar
Once the pistachio filling is in place and level, it's time to seal the bar.
Pour the remaining melted chocolate over the top, making sure it fully covers the filling. If the chocolate has started to set, just warm it gently again until it's pourable, but not too hot.
Use the back of a spoon or a small spatula to gently spread the chocolate across the mould, covering all edges.
Then, take a flat plastic scraper, offset spatula, or even the back of a butter knife, and scrape away the excess chocolate from the surface. Let the extra drip back into your bowl; this helps keep the back of your bar flat and clean.
Tip: Scraping off the excess also helps seal the edges neatly, which is especially important if you left space around the sides during the filling step.
Place the mould in the fridge for at least 20–30 minutes, or until the bar is completely set and firm to the touch.

Step 7: Unmold, Reveal, and Enjoy
Once the chocolate has fully set, it's time for the most satisfying part: the unmolding.
Gently peel back the edges of your silicone mould and lift the bar out, slowly, carefully, like unveiling a little work of art. You'll see the gleam of the chocolate shell, the colourful splashes you flicked earlier, and (hopefully) a beautifully smooth finish.
Now, for the big reveal: slice into the bar with a sharp knife. That first cut is magic, the crack of the shell, the soft green of the pistachio, the golden crunch of the kataifi peeking through.
Take a bite.
It's sweet. It's nutty. It's rich. It's crisp.
It's homemade Dubai chocolate, and you made it yourself.


A quick note on my result:
As you'll see in the photo, my decorative green layer didn't survive the final pour, the chocolate was a bit too warm, and it melted the design underneath. It's a good reminder that even when things don't look perfect, they can still taste incredible, and this bar absolutely did. So don't stress about the look too much. The magic is in the making.
As for the chocolate itself, I do recommend using chocolate chips for convenience, but melting down a chocolate bar works just as well, especially if you already have a favorite. It gives you control over the flavor, and the end result is exactly the same.
Tips for Success
- The crunchiness of the kataifi pastry is crucial, take time to ensure it's well toasted. If you don't have a large frying pan, halve the quantity and cook in two batches.
- The salt is key to balancing the sweetness of the filling.
- Use a deep chocolate mould to fit enough of the delicious filling.
- Coconut oil helps the chocolate melt more smoothly and gives a shine when finished.
- Take time in the molding phase especially if you want to have some decorative layers. Take additional steps to let the chocolate set before progressing.
🧾 Ingredient Cost Breakdown
| Ingredient | Purchased Quantity | Used Quantity | Price Paid | Cost Used | Notes |
|---|---|---|---|---|---|
| Pistachio Paste | 180g | 180g | £9.00 | £9.00 | Full jar used from list |
| Dark/Milk Chocolate | 200g | 200g | £2.00 | £2.00 | Entire bar used |
| Unsalted Butter | 250g | 50g | £1.99 | £0.40 | President unsalted butter |
| Kataifi Pastry | 500g | 100g | £15.00 | £3.00 | Purchased in bulk from list |
| Tahini Paste | 330g | 20g | £12.99 | £0.79 | Purchased in bulk from list |
| Coconut Oil | 200ml | 10ml | £2.99 | £0.29 | Purchased in bulk from list |
| White Chocolate | 100g | 20g | £1.00 | £0.20 | Chocolate chips |
| Food Coloring | 120ml | ~2ml | £4.99 | £0.08 | Estimated from a 12-color set from list |
| Total Cost: | Approximately £15.76 | ||||
💡 Final Thoughts
Crafting your own Dubai chocolate bar at home not only allows for customization but also offers significant savings compared to purchasing similar luxury chocolates, which can range from £20 to £30 per bar in the UK. Plus, the joy of creating it yourself adds an invaluable touch to the experience.